What Is a Rear Projector Screen for Outdoor Use?

Time:2026-10-15 Author:Oliver
0%

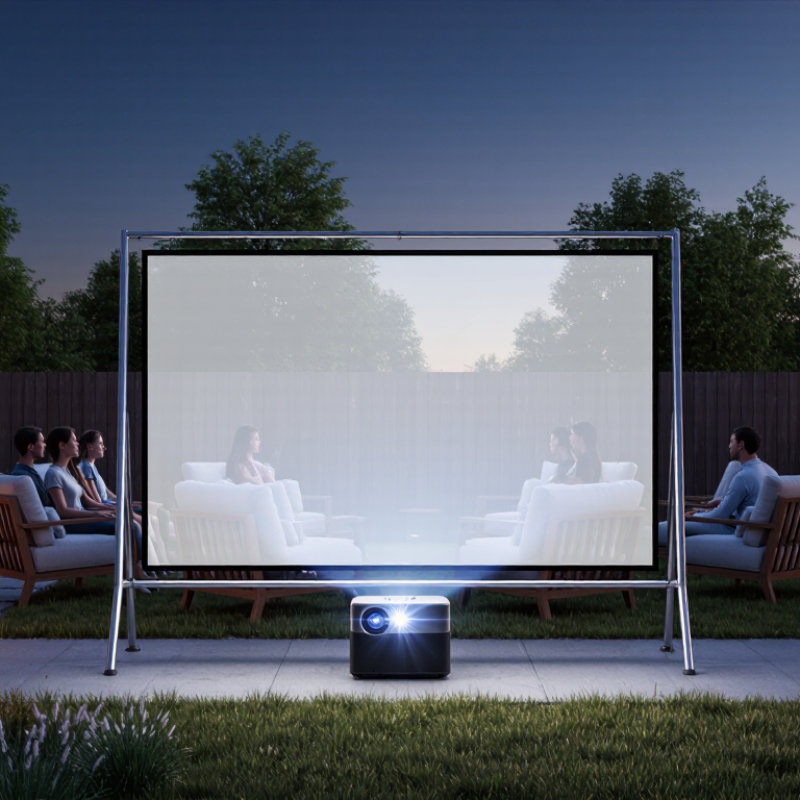
A Rear Projector Screen Outdoor setup creates images from behind the screen, keeping the projector away from viewers and walkways. This arrangement reduces shadows across the picture and keeps the equipment less visible during an evening event. Unlike front projection, rear projection can produce a cleaner viewing experience when guests move near the screen. It is useful for backyard movies, community presentations, garden weddings, and temporary outdoor displays.

The screen material is the key component. A quality rear projection fabric must transmit light evenly while preserving contrast, color, and sharpness. Its frame should remain stable when wind changes or guests pass nearby. I have found that a perfectly flat surface matters more than many buyers expect. Small wrinkles can scatter light and make faces look uneven. That detail is easy to miss.

Outdoor conditions still create limits. Direct sunlight can overpower the projected image, even with a bright projector. Evening shade usually provides better results. The projector also needs protection from moisture, dust, and accidental contact. Check the viewing angle before installation, because some rear screens lose brightness from the sides. A Rear Projector Screen Outdoor solution is not magic. It requires careful placement, suitable brightness, and realistic expectations. Test the image before guests arrive. Colors may appear different than they did indoors, especially against artificial lighting. Choosing trusted screen specifications and following the manufacturer’s setup guidance can improve reliability, safety, and viewing quality.
What Is a Rear Projector Screen for Outdoor Use?

Definition and Optical Principle of Outdoor Rear Projection Screens

An outdoor rear projector screen is a translucent display surface viewed from the opposite side of the projector. The projector sits behind the screen, while viewers face its front. This arrangement keeps equipment away from foot traffic and reduces visible shadows during presentations, outdoor films, or stage performances.

Its optical principle depends on controlled light diffusion. Projected light passes through the screen material and spreads toward the audience. A good rear projection surface preserves brightness, contrast, and image detail across a useful viewing angle. However, direct sunlight can wash out dark scenes, even when the projector appears powerful. In my experience, screen placement matters as much as projector specifications. A pale wall behind the screen, nearby lamps, or wet ground can also affect perceived color. The image may look impressive during setup, then appear flat after sunset changes.

Tips: Place the projector on level, dry ground and keep its lens centered with the screen. Test the image from both the center and side seating areas. Check brightness at the actual event time, not only indoors. Leave space behind the screen for ventilation and safe movement. A small crease can distort subtitles or straight lines. I once underestimated wind, and the screen surface moved enough to soften the picture. That detail is easy to miss.

Screen Materials: Gain, Viewing Angle, and Ambient-Light Performance

A rear projector screen for outdoor use places the projector behind a translucent surface. This arrangement keeps viewers away from the light path. It also reduces shadows when people walk near the image. In practice, the screen needs enough depth behind it for the projector’s throw distance. I have found that a pale, evenly lit surface looks better than a brighter image with visible hotspots. That matters.

Screen gain describes how strongly the material reflects or directs light. A gain near 1.0 usually provides balanced brightness and a comfortable viewing angle. Higher gain can help in dim projectors, but it may create bright centers and darker edges. Wide viewing angles suit gatherings with chairs spread across a patio. Narrow-angle materials may look brighter from the center, yet lose contrast from the sides. Ambient light remains the hardest problem. Porch lamps, moonlight, and nearby windows can lift black areas into gray. A darker or contrast-focused material may improve perceived depth, but it cannot remove unwanted light. Test it outdoors. Use the actual projector, viewing positions, and lighting conditions. I still make mistakes by judging a sample indoors, where colors appear cleaner. Screen specifications are useful, but real placement often reveals limitations. A wrinkle, uneven frame, or damp surface can also distort the picture. Reliable results come from checking gain, angle, texture, and nighttime light together.

Sizing Standards: 16:9 Aspect Ratio and Viewing-Distance Calculations

A rear projector screen for outdoor use places the projector behind the viewing surface. This keeps guests from crossing the light path. It also reduces shadows during movement. For dependable planning, measure the visible image area, not the outer frame. A 16:9 screen remains the practical standard for films, games, and most modern video sources.

For a 16:9 image, width equals diagonal size multiplied by 0.872. Height equals diagonal multiplied by 0.490. A 120-inch diagonal screen is about 104.6 inches wide and 58.8 inches high. Viewing distance can begin at 1.5 to 2.5 times the screen width. Therefore, this example suits roughly 13 to 22 feet of seating distance. Closer seating feels more immersive. Farther seating may hide fine text.

Light changes everything. In a dim garden, a larger image may work well. Under patio lamps, a smaller, brighter image can look clearer. The calculation is clean; the yard is not. I usually place a chair at the farthest expected seat, then test subtitles and faces before fixing the screen. Rear projection also needs space behind the screen for the projector and airflow. Do not calculate only the image size. Include the projector’s throw distance, cable route, and a small buffer for imperfect alignment.

What Is a Rear Projector Screen for Outdoor Use? - Sizing Standards: 16:9 Aspect Ratio and Viewing-Distance Calculations

Calculation basis: A 16:9 screen has a width-to-height ratio of 1.777:1. Screen width = diagonal × 0.8716; screen height = diagonal × 0.4903. Viewing distances are calculated from the horizontal viewing angle: 30° provides a comfortable general-purpose view, while 40° creates a more immersive view.
Screen Diagonal Screen Width Screen Height Width × Height
(Metric)
Approx. Distance
for 30° View
Approx. Distance
for 40° View
Typical Outdoor Use
80 in 69.7 in 39.2 in 1.77 × 1.00 m 10.8 ft / 3.31 m 8.0 ft / 2.43 m Small patio or compact backyard viewing
100 in 87.2 in 49.0 in 2.21 × 1.25 m 13.6 ft / 4.13 m 10.0 ft / 3.04 m General backyard movie nights
120 in 104.6 in 58.8 in 2.66 × 1.49 m 16.3 ft / 4.97 m 12.0 ft / 3.65 m Medium to large backyard seating areas
135 in 117.7 in 66.2 in 2.99 × 1.68 m 18.3 ft / 5.59 m 13.5 ft / 4.11 m Large gatherings and community-style viewing
150 in 130.7 in 73.5 in 3.32 × 1.87 m 20.3 ft / 6.20 m 15.0 ft / 4.56 m Large lawns, events, and extended seating rows
180 in 156.9 in 88.2 in 3.99 × 2.24 m 24.4 ft / 7.44 m 18.0 ft / 5.47 m Large outdoor presentations and event spaces
Rear-projection definition: The projector is positioned behind a translucent screen, allowing viewers to watch from the opposite side. This keeps the projector out of the audience’s sightline and reduces front-cast shadows.
Outdoor planning note: Allow additional space behind the screen for the projector, ventilation, weather protection, and access. The exact depth depends on the projector’s throw ratio.
Installation note: Screen dimensions exclude the frame, border, legs, and support hardware. Confirm the usable image area before selecting the projector and mounting location.

Projector Requirements: ANSI Lumens, Throw Distance, and Contrast Ratio

What Is a Rear Projector Screen for Outdoor Use?

Projector Requirements: ANSI Lumens, Throw Distance, and Contrast Ratio

A rear projector screen sits between the projector and viewers. Light passes through its translucent material, so the projector stays hidden behind the screen. This arrangement prevents shadows when people walk in front of the image. It also keeps fan noise and cables away from the audience. However, rear projection needs usable space behind the screen.

ANSI lumens matter more than impressive brightness claims. For a 100-inch screen at dusk, 2,500 to 3,500 ANSI lumens may produce a comfortable image. Brighter surroundings require more output or a smaller screen. A 3,000-lumen projector can still look weak beside patio lights. I would test the screen after sunset, not only in a dark room.

Throw distance depends on the projector’s throw ratio and screen width. A projector with a 1.5 ratio needs about 15 feet for a 10-foot-wide image. Rear projection makes this distance less convenient, because the equipment must fit behind the screen. Short-throw models can reduce that footprint, but their placement becomes less forgiving. Measure twice.

Contrast ratio controls shadow detail and black levels. Outdoor light can make blacks appear gray, even with strong brightness. A screen material with suitable light transmission may improve viewing angles, but it can reduce perceived contrast. Native contrast usually offers more reliable information than inflated dynamic figures. The best setup balances brightness, distance, screen material, and the actual evening environment.

Installation Safety: Weather Resistance, Wind Load, and Screen Tension

What Is a Rear Projector Screen for Outdoor Use?

Installation Safety: Weather Resistance, Wind Load, and Screen Tension

A rear projector screen outdoor setup places the projector behind the image surface. This keeps viewers away from cables and prevents shadows across the picture. The screen still needs careful protection from rain, dust, and sudden temperature changes. Weather-resistant materials help, but they do not make the installation waterproof. Check every seam, frame joint, and cable connection before use.

Wind is usually the greatest safety concern. A large screen can behave like a sail during gusts. I once underestimated a mild evening breeze, and the lower frame began shifting across the patio. Use weighted bases, ground anchors, or a properly engineered support structure. Never rely on decorative stands alone. Local wind conditions matter more than a generic product rating. Remove the screen when forecasts show strong gusts or storms.

Screen tension also affects safety and image quality. The surface should remain flat without excessive pulling at the corners. Loose fabric can ripple and distort subtitles, while over-tightening may damage grommets or seams. Adjust tension gradually and inspect attachment points by hand. Leave enough clearance behind the screen for the projector and airflow. I still recheck the setup after installation, because outdoor surfaces settle and hardware can loosen. That extra check is easy to skip. It should not be.

Outdoor Rear Projector Screen: Wind Load and Installation Safety

Estimated wind pressure rises with the square of wind speed. Values are based on the standard dynamic-pressure formula q = 0.613V², where V is wind speed in meters per second. The equivalent force assumes a 10 m² screen with a flat, fully exposed surface.

These figures illustrate why outdoor screens require secure anchoring, weather-resistant materials, adequate screen tension, and suspension of use when wind conditions exceed the installation limits specified by the screen structure.

FAQS

What is a rear projection screen for outdoor viewing?

The projector sits behind a translucent screen. Light travels toward the audience through the material. This reduces shadows and keeps cables away from guests.

Why is a 16:9 screen commonly used?

A 16:9 shape suits films, games, and modern video sources. It provides a familiar widescreen image. The format is practical, not perfect for every source.

How wide and tall is a 120-inch 16:9 screen?

The visible image is about 104.6 inches wide and 58.8 inches high. Measure the image area, not the outer frame. Frames can add several inches.

How far should viewers sit from the screen?

A useful starting range is 1.5 to 2.5 times the screen width. For a 120-inch screen, seating may work around 13 to 22 feet away. Closer seats feel more immersive. Farther seats may lose small subtitles.

How bright should an outdoor projector be?

A 100-inch screen may need about 2,500 to 3,500 ANSI lumens at dusk. Patio lights can make a 3,000-lumen projector look weak. Test after sunset.

How does outdoor lighting affect screen size?

A dim garden can support a larger image. Under bright lamps, a smaller image may look clearer. Brightness claims alone do not guarantee a readable picture.

How much space does rear projection require?

You need room behind the screen for the projector, airflow, cables, and alignment. Throw distance depends on the projector’s throw ratio. A 1.5 ratio needs roughly 15 feet for a 10-foot-wide image.

How can I test the setup before installation?

Place a chair at the farthest expected viewing position. Check faces, subtitles, and dark scenes after sunset. Measure twice. The yard often disagrees with the calculation.

Conclusion

A Rear Projector Screen Outdoor is a specially designed projection surface that allows viewers to watch an image from the side opposite the projector. Instead of reflecting light toward the audience, its translucent material transmits and diffuses the projected image, making it useful when the projector needs to remain hidden or placed behind the screen. Performance depends on screen gain, viewing angle, and resistance to ambient light, so the material should be selected according to the venue and expected audience position.

For a clear and balanced display, a 16:9 aspect ratio is a common sizing standard, while screen dimensions should be matched to viewing distance and audience layout. The projector must provide sufficient ANSI lumens, an appropriate throw distance, and a suitable contrast ratio for outdoor conditions. Safe installation also requires weather-resistant materials, reliable screen tension, and support for expected wind loads. Proper anchoring and a stable frame help maintain image quality while reducing movement and improving overall viewing safety.


Oliver

Oliver

Oliver is a seasoned marketing professional with a wealth of expertise in driving brand awareness and engagement. With a deep understanding of our company's product offerings, he consistently delivers high-quality content that enriches our professional blog. His insights not only shed light on......